
Written by Kait Fowlie
Salt dough is a super easy, bake-able clay that you can use to easily make sculptures and ornaments. It only takes 3 ingredients, all of which you likely already have on hand, and a few minutes to prepare. If you’re looking for a simple, not-too-messy holiday craft to do with kids on a frosty December afternoon before the holidays, salt dough ornaments is definitely a winner.
You’ll need:
1 cup salt (for a smooth, soft dough, use a good quality table salt – not sea salt)
2 cups flour
3/4 cup water
Rolling pin
Metal cookie cutters
Cookie sheet
Paints
Twine
How to:
In a large bowl, mix together salt and flour. Gradually stir in the water until it forms a doughy consistency, (more like bread, less like muffin mix). Add more water / flour as needed to make the dough drier / more malleable.
Turn the dough over onto a wooden cutting board or table (flour the surface if your dough is on the sticky side), and knead with your hands until smooth.
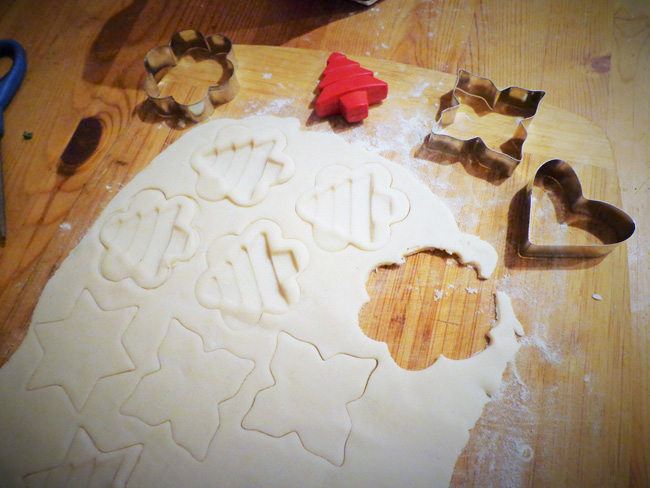
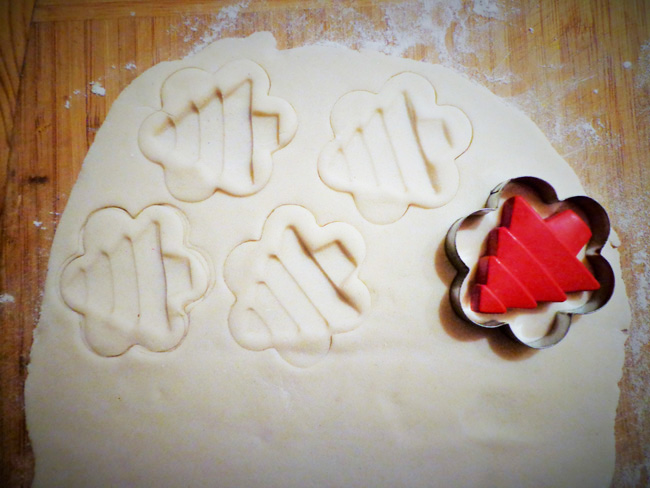
Roll out with a rolling pin until 1/2 inch thick and even. Press a stamp into the dough to create an indent and cut a shape around it with a cookie cutter. Lift each piece with a thin spatula and place onto a cookie sheet. Use a straw or a chopstick to press a hole into the edge of each ornament, so you can string twine through to make it hang-able.
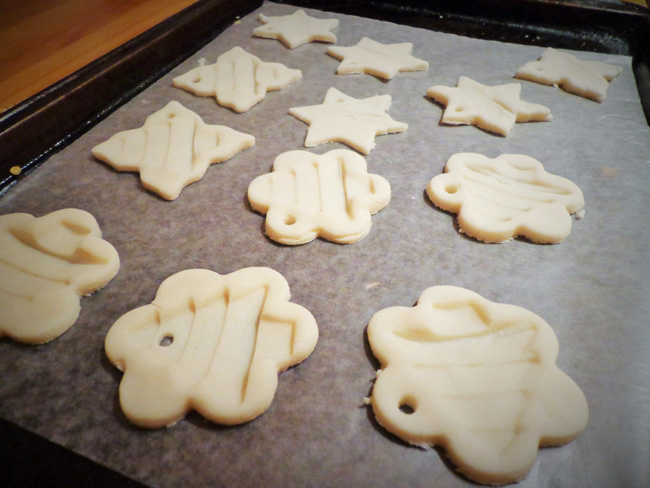
Bake at 350 for 30 minutes. If your ornaments are thicker, bake for up to an hour. Be aware that they may come out puffy. Some may be puffier than others. It’s ok if they come out uneven colours – they’ll be painted.

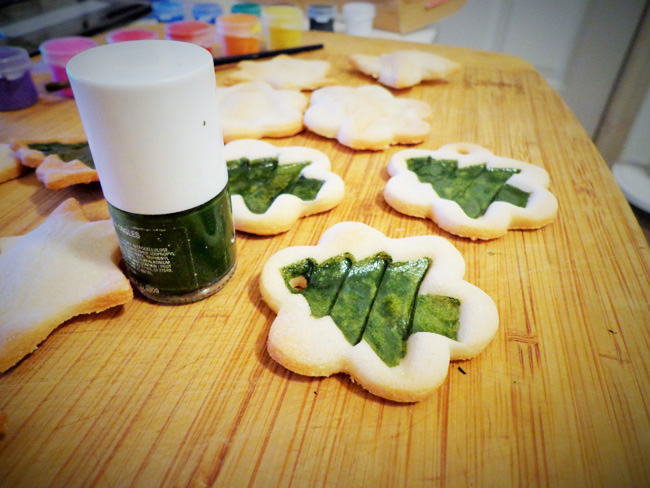
When your ornaments are cooled, paint and decorate to your liking. We used a christmas tree stamp and regular paints for these. String some twine through the hole to create a loop and hang on your tree! Pro tip: “varnish” your salt dough ornaments with clear nail polish after they’re painted and dry for a shine.
You came make this dough ahead of time and wrap in plastic wrap and stash in the fridge for up to a few days.

The final product: beautiful decorations to hang on the tree that the kids will be proud of!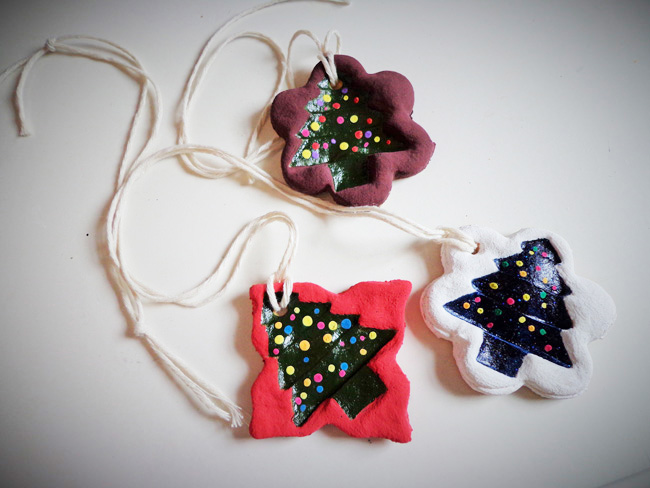
cute! i never thought about using the stamp, i’ve always been a “shape-maker”.
We love the stamp idea, too! Just gives it that little extra!